User Instructions

User Instructions:
  • 1. GATHER the paperwork for each Hazardous Material (HM) shipment on the trailer.
  • 2. IDENTIFY the HM “Class” of each HM shipment or item on the trailer.
  • 3. SELECT the HM “Class” for the HM shipment or item from the pull-down “Class” list below. Note:If the “Class” is not on the list, we DO NOT HAUL the HM class -- see your supervisor.
  • 4. ENTER the proper “UN/NA#” for the HM shipment or item in the entry field next to the selected “Class”.
  • 5. ENTER the weight (in pounds) of the item in either the “Non-Bulk” or “Bulk” field. Note: “Bulk” packaging - for LIQUID containers of capacity greater than 119 gallons, for SOLID containers of net capacity greater than 882 pounds, and for GAS containers of capacity greater than 1,000 pounds.
  • 6. LEAVE the “Subsidiary” field blank and then SELECT “ADD” to process your entries.
  • 7. REPEAT steps # 2 to # 6 for each of the HM shipments or items on the trailer.
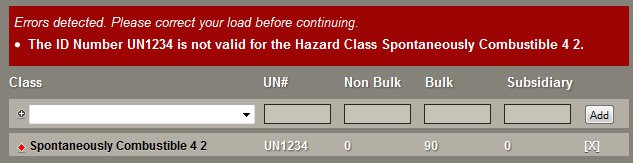
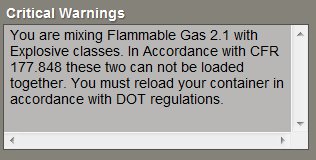
  • 8. After all HM items and shipments have been added, SELECT “Submit”. Note: The screen will display the HM items, load warnings, 
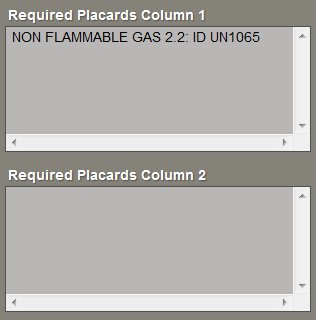
and the required HM PLACARD.
  • 9. ENTER the trailer number these shipments are loaded on and SELECT “Print”.
  • 10. A report will PRINT with all HM items by class; follow the load warnings and apply required HM PLACARD
  • Forward Air does not transport:
    • All 1.1, 1.2, 1.3
    • 1.5 Explosives
    • All 2.3 and 6.1 PIH classes
    • Organic Peroxide 5.2 Type B
    • 6.2 Infections substances and Radioactive III
Any questions or safety concerns Call Roger Ecker Office: 574-236-2250 Cell: 574-274-4505 If unreachable contact Al Slobodian Office: 404-362-2458
  • Radioactive white I or yellow II never require placards.

Instructions

  1. Select a hazard class to add to your truck load.
  2. Type in the UN or NA number. Example: UN1065 or NA2927
  3. Add in the weight of your load (in pounds) as Non-Bulk, Bulk, or Subsidiary.
  4. Once you are finished, click the "Add" button to add the load to the wizard.
    Figure 1
  5. The added weight will appear in a list below the Add row. This list will continue to grow as you add more weights to your truck load. You can click the [X] link next to each row to delete the row from your truck load.
    Figure 2
  6. Placard Wizard will also check that your UN or NA numbers are valid for the hazard class you chose.
    Figure 3
  7. When you are ready, click the "Submit" button to process your truck load. This will deduct one credit from your account. Placard Wizard will ask you first before processing your truck load. The results are shown underneath the "Submit" button.
    Figure 4
  8. If Placard Wizard detected any critical issues with your truck load, you will be notified of the issue at this time. These critical warnings will need to be dealt with before Placard Wizard can issue a placard for your truck load.
    Figure 5
  9. Once you have your placard(s), you can print them out by clicking the "Print Placards" button beneath the Results windows.